

NOTE: This feature is only available with Little Musician Pro.

Page Map:
- Music Notes Lessons:
- Clap-Along Lessons:
- Knowledge Lessons
- Courses/Multiple Lessons
- The Override Function
In this tutorial, we are going to teach you how to customize your Little Musician lessons.
To adjust your playback settings,
- Go to the PLAY/EDIT screen.

- From your Lesson Panel on the left, select the specific type of lessons, or courses that you want to customize, and

- You will see the Preview/Settings Panel changes simultaneously.
Music Notes Lessons
Let's first look at how to change the settings for Music Notes lessons.
Choose a lesson, and then click Settings. The Music Notes Settings window will pop up.

At the top of the settings window, you can edit the name of the lesson.
Below it, you should see three main tabs: Lesson, Sounds & Display, and Slides and six sub tabs under the Lesson tab: Notes, Scales, Chords, Song File, Random and Rhythm.
- The corresponding tab should already have been opened. If you are just editing the lesson, stick with it; if you are editing a new lesson, choose the lesson type from the six sub tabs.
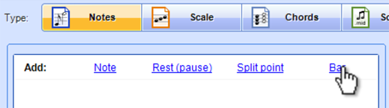
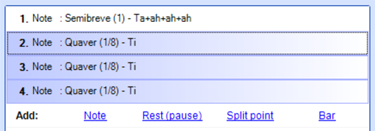
- Creating or editing a Notes Lesson is easy, you can add notes, rests, split points and bars conveniently from the end of the list, just click on what you want to add.
You can also preview, edit or delete an existing note by clicking the icons located on the right side of the note names.

The set of buttons at the bottom of the note list are here to help you as well. You can pre-listen to all the notes, select all or rearrange their positions using the up and down arrow.

Furthermore, you can add notes from the musical keyboard! Open the keyboard using the keyboard icon.

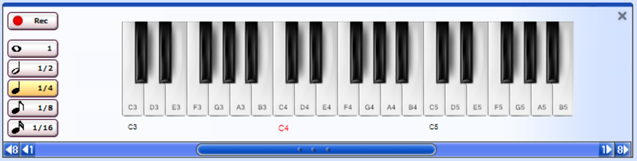
Choose the tempo you want, then click REC and start playing! The notes will be added automatically to the list, just hit stop when you are done. On the right side of the settings window, you can set the Key and the Time signature, you can also choose how to show the notes and transpose the notes as well.

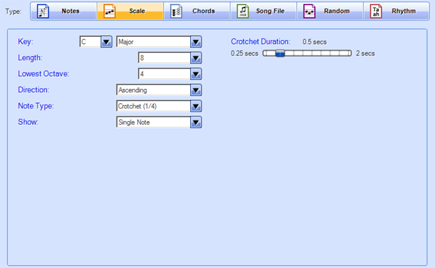
- If you are creating or editing a Scale Lesson, you can select the Key you want, set the Length, and choose the Lowest Octave, Direction, Note Type and also how to show the notes. You can also adjust the Crotchet Duration.
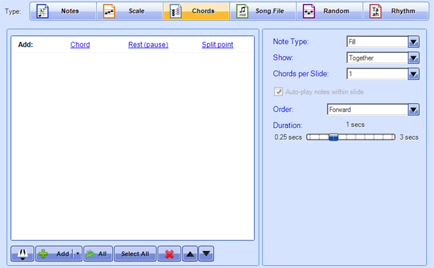
- Creating or editing a Chords Lesson is about the same as creating or editing a Note Lesson. Instead of putting in notes, you will be putting in chords! You can also choose the Note Type, how to show the notes and chords, and the duration.
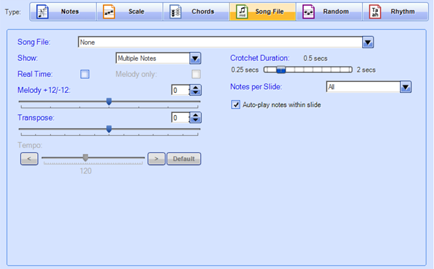
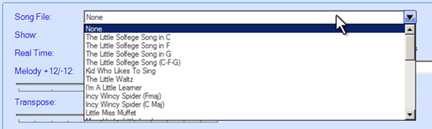
- When creating or editing a Song Lesson, you can, of course, change the song; how to show the notes set the Melody, Tempo and Transpose.
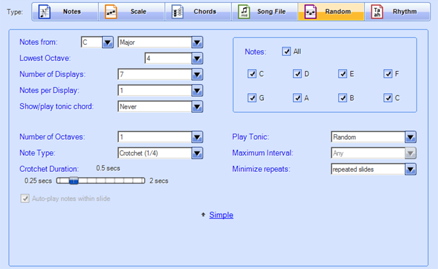
- A Random Notes Lesson shows a number of notes randomly to your child. You can choose the scale of where the notes are from, which notes to choose from, Lowest Octave, Number of Displays, Notes per Display and so on. Click Advanced for more advanced lesson settings.
- Last, there is the Rhythm lesson; again, the layout of the settings page is pretty much the same as the settings pages for Notes and Chords Lesson. Instead of keying notes and chords, you just put in beats, and set the Time signature.
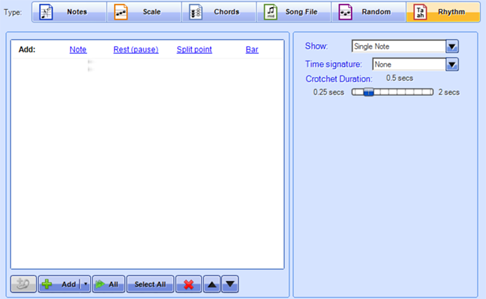

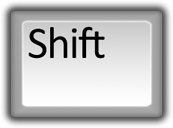
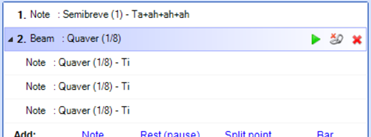
To put a beam between Quavers (1/8) or Semiquavers (1/16) notes, just select the notes holding down SHIFT key and click on the connect button.
- Creating or editing a Notes Lesson is easy, you can add notes, rests, split points and bars conveniently from the end of the list, just click on what you want to add.

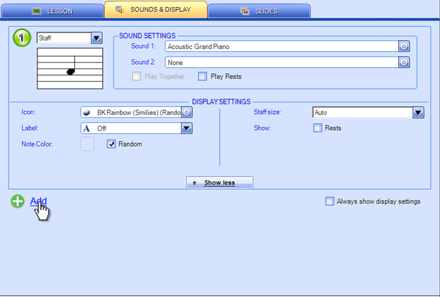
- After editing the lesson property, go to the Sound & Display tab.
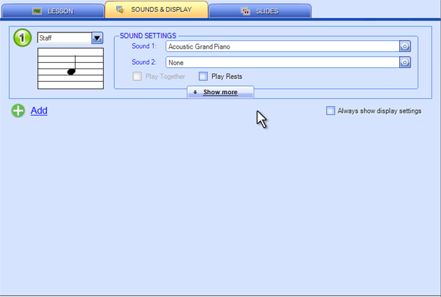
You can choose how the notes will be shown: in the staff, on the musical keyboard or just the note name. Click on show more to see more display options. You can even add more than one display method to give more variety in your lesson by pressing the Add button.
- Last, is the Slides tab, in here, you can select a different playback mode, change the Font type, size and color, and change the background color.
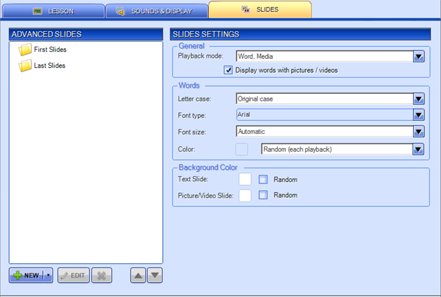
On the left side, is the slide list arranged under two folders: First Slides and Last Slides.
Slides under the First Slides folder will be shown before the lesson and the slides under the Last Slides folder will be shown after the lesson. You can create, edit or delete a slide using the set of buttons below the slide list. Creating and editing a slide is just like editing words for knowledge lessons. If you would like to know how to do this, please watch our other video tutorial about how to edit words in Little Musician. Remember to click on the Save button to apply the changes or Save As a new lesson!

Clap-Along Lessons
Now, let's look at how to create or edit a Clap-Along lesson. Toggle to the Clap-Along lesson list. Then, choose a lesson.
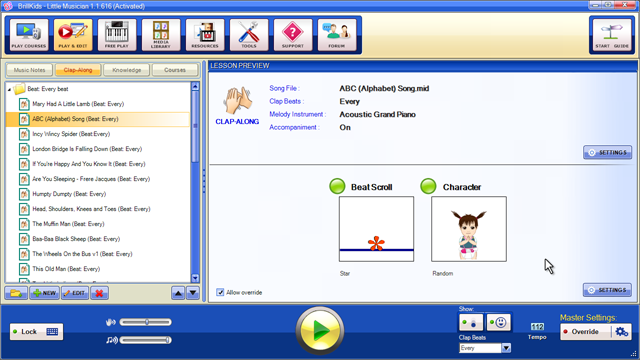
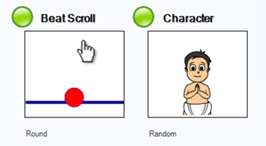
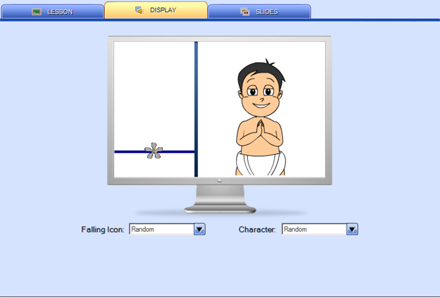
You can already make some changes to the lesson on the Lesson Preview section and the Play panel. If you click on the preview of the Beat Scroll and Character, you will be able to switch icons and characters.
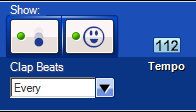
On the play panel, you can choose to show which visual aid to show: Beat Scroll, Character, both or none. You can also change the tempo and select another set of Clap Beats.
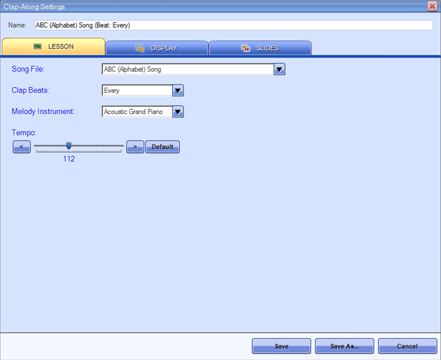
If you would like more settings options, click on Settings. The Clap-Along Settings window should pop up. It is the same window as creating a new Clap-Along Lesson.
-
At the top of this window, you can name your lesson.
-
Under the Lesson tab, you can pick the song that is going to be played and choose an instrument to play that song.
- The Beat Scroll and Character settings options are under the Display tab.
- Under the Slide, you can select a different playback mode, change the Font type, size and color, and change the background color.

You can also edit, create or delete a slide, before or after the lesson, using the set of buttons below the slide list on the left.
Creating and editing a slide is just like editing words for knowledge lessons. If you would like to learn more about how to do this, please watch our other video tutorial about how to edit words in Little Musician.
Knowledge Lessons
If you would like to know how to set Playback settings for Knowledge lessons, please watch our other video tutorial about how to customize playback settings in Little Musician.
Multiple Lessons
No matter which type of lessons you are editing, if you have selected more than one lesson, you are going to be brought to the Edit Multiple Items Screen.
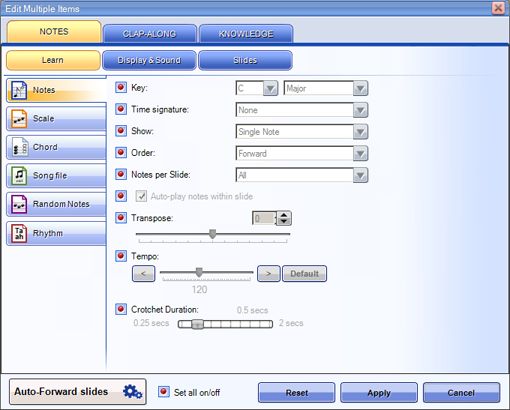
There are only a few small differences between the Edit Multiple Items Screen and the other settings window which are the three tabs on the top that allows you to toggle through setting pages for Notes, Clap-Along and Knowledge Lessons. However, you will not be able to save settings as a new lesson. All the settings will only be applied to the selected lessons.
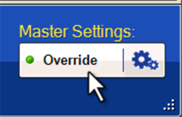
The Override Function
And last but not the least, there is the Override settings button located at the right bottom corner.

Making settings changes here will allow you to apply these changes to EVERY one of your lessons temporarily, of course, on top of their own settings. Click on the cog button to set your global playback settings.
Click on the red lights so it will turn green and you will be able to change the global setting for that specific option.
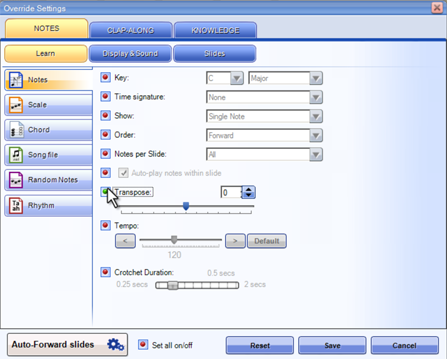
Remember to click on save when done.
You can always turn on or off this Override function by toggling between the red or the green light. Red means off; green means on.
And that's pretty much how simple it is to customize your lessons and playback settings! Why don't you give it a try today? And see how it makes your child's Little Musician lessons even more exciting.
Comments