

Changing DPI (Dots Per Inch) resolution is one of ways you can customize your PC. When a larger or smaller resolution is applied, all of the elements viewed on the monitor screen are altered.
Note: Little Reader, Little Math and Little Musician's recommended DPI settings are the default 96 DPI.
For Windows XP Users:
1. Click on the Start menu on your computer's desktop and choose Control Panel. Select Appearance and Themes and then Display.
2. Go to the Settings tab and click on Advanced, then go to the General tab.
3. Choose a new setting for the DPI from the DPI Setting drop-down list. (Note: You may elect to create a custom size setting. If so, click on Customize within the DPI Setting drop-down list.)
4. Click OK at the Change DPI Setting prompt.
5. Click Yes to use existing files that are already installed on your computer; otherwise, click No. (Note: If you select No, you will need to provide a disc containing the DPI files. To avoid any unwanted surprises, elect to use the existing files already downloaded on your computer when prompted.)
6. Click Apply and then press Close. You may need to restart your computer to activate the new settings.
For Windows Vista Users:
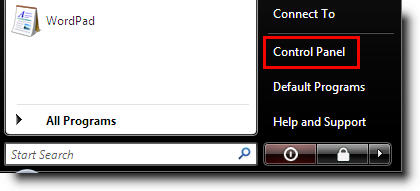
1. Click on Control Panel.
 2. Now type Adjust font size in the search box. It will take you directly to the link for the DPI Scaling Utility.
3. Click on 96 DPI which is normal font size.
4. Hit Enter on your keyboard to accept OK.
For Windows 7 and Windows 8 Users:
1. Right click on a empty area of your desktop and choose Personalize.
2. Click on the Display link at the bottom left corner.
3. Now you will see this screen.
4. To select a DPI size. Choose a size that you desire. Here are three choices.
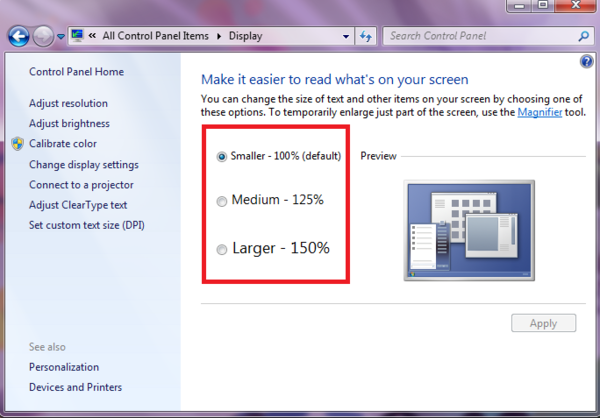
Smaller - 100% = 96 DPI(Pixels/Dots Per Inch)
Medium - 125% = 120 DPI (Pixels/Dots Per Inch)
Larger - 150% = 144 DPI (Pixels/Dots Per Inch)
5. Click on the Apply button.
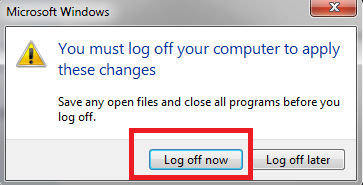
6. Click on the Log off now button.
Comments