

NOTE: The following feature is only available with Little Musician Pro.

Just like Notes lessons, this lets you add chords using the Music Keyboard or manually.
Adding Chords Using the Keyboard Display
Access the Music Keyboard by clicking on the keyboard button at the lower right part of the window.
You may use your mouse to click on the keys and preview what you want to record (alternatively, you may click the keyboard keys that correspond to the keys in the Music Keyboard). Use the horizontal scrollbar below the Music Keyboard to go to the different octaves of the keyboard.

Choose the chord you want to add from selection on the left side of the Music Keyboard (e.g., Major, minor, etc.)
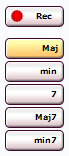
When you're ready to create your Chords lesson, click on the Rec button (it will change to a Stop button), select a chord type, then click on the keys in the Music Keyboard to start adding chords to the Chords box. Once you're done, click on the Stop button to stop recording.
Adding Chords Manually
In the Chords box on the left side of the window, click on Chord, Rest (pause), or Split Point, depending on what you want to add to your lesson.

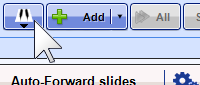
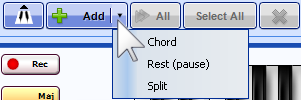
Alternatively, you may click on the Add button at the bottom of the chords box to add a chord. Click on the expand button beside the Add button to select Rest (pause), or Split Point from the dropdown menu.
Once you've added a chord, you may edit it further - for C, F, and G Major Chords, you have an additional option to set chord inversions (root, first inversion, and second inversion). When you're done editing, click on the green check button to save the changes, or simply continue adding chords to your list (this will save the changes in the previous chord automatically).

Similar to "Notes" mode, you can edit, delete, and add rests and split points to the chord items list, as well as change various lesson settings.
Adding Rests and Split Points
Add a Rest (pause) to the Chords box if you want to have a pause during your Chords lesson.
A Split Point lets you control which group of chords will be displayed on the staff per slide. Setting split points is most useful when your Chords lesson is set to show chords "Together" during playback.
Editing Notes, Rests, Split Points and Bars
You may preview, edit, or delete any Chord, Rest, or Split Point you've added to your Chords box by clicking on the corresponding buttons beside it.
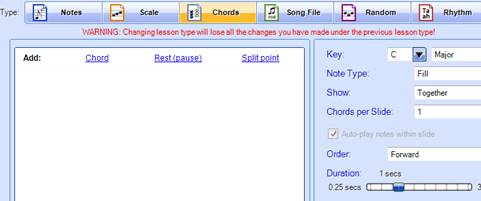
Chords Lesson Settings
The right side of the window contains several lesson settings which you can use to further customize your Chords' lesson.

Set which Note Type, playback Order, and Duration (i.e., how long a chord is played in absolute time) will be used when your Chords lesson is played.
Choose how Little Musician will show notes during playback: Together, Separated, or On Click.
Related Article:
Comments