

NOTE: The following feature is only available with Little Musician Pro.

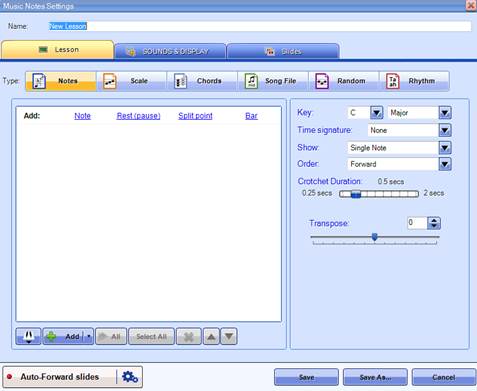
This lesson type allows you to add individual notes of your own choosing, and gives you the greatest flexibility. You can add notes in two ways: by using the music keyboard display, or manually.
The notes you add will be listed in the Notes box (at the left side of the window). The order in which your notes are listed will translate to how these are written on the staff (or stave) during playback.
Adding Notes Using the Music Keyboard
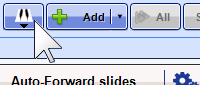
Access the Music Keyboard by clicking on the keyboard button at the lower right part of the window.
You may use your mouse to click on the keys and preview what you want to record (alternatively, you may click the keyboard keys that correspond to the keys in the Music Keyboard). Use the horizontal scrollbar below the Music Keyboard to go to the different octaves of the keyboard.

Choose the note value you want to add from selection on the left side of the Music Keyboard (e.g., whole note, quarter note, etc.)
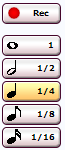
When you're ready to create your Notes lesson, click on the Rec button (it will change to a Stop button), select a note value, then click on the keys in the Music Keyboard to start adding notes to the staff. Once you're done, click on the Stop button to stop recording.
Adding Notes Manually
In the Notes box on the left side of the window, click on Note, Rest (pause), Split Point, or Bar depending on what you want to add to your lesson.

Alternatively, you may click on the Add button at the bottom of the notes box to add a note. Click on the expand button beside the Add button to select Rest (pause), Split Point, or Bar from the dropdown menu.

Once you've added a note, you may edit it further to specify an octave or note value for it from the corresponding dropdown list. When you're done, click on the green check button to save the changes, or simply continue adding notes to your list (this will save the changes in the previous note automatically).

Adding Rests, Split Points and Bars
Add a Rest (pause) to the Notes box if you want to have a pause during your Notes lesson.
A Split Point lets you control which group of notes will be displayed on the staff per slide. Setting split points is most useful when your Notes lesson is set to show "Multiple Notes" during playback.
Add a Bar to divide notes into measures. Like split points, adding bar lines is most useful when your Notes lesson is set to show "Multiple Notes" during playback.
Editing Notes, Rests, Split Points and Bars
You may preview, edit or delete any Note, Rest, Split Point, or Bar you've added to your Notes box by clicking on the corresponding buttons beside it.

Notes Lesson Settings
On the right-hand side you will find the lesson settings, where you can, for example:
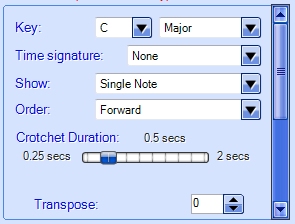
- Set the key and time signatures of the lesson.
- Change between showing single notes, showing multiple notes, or letting the notes scroll across the screen as they are played. If “Multiple Notes” is selected, set how many notes you wish to see in a single slide as a maximum, and whether the notes should play automatically within the slide.
- Change how long a note is played for in absolute time (using “Crotchet Duration”).
- Transpose the notes up or down by semitones.
- Shift the melody track up and down by octaves.
Related Article:
Comments